How to stagger joints in a multi ply beam for the strongest girder
Understanding how to stagger joints in a multi ply beam helps you create a super strong floor. When constructing a multi-ply built-up beam (such as a floor girder made from three layers of 2x10 lumber), staggering the joints is critical for maintaining structural integrity. If individual board joints align at the same point, it creates a weak spot that significantly reduces the load-bearing capacity of the girder.
How to stagger joints in a multi ply beam
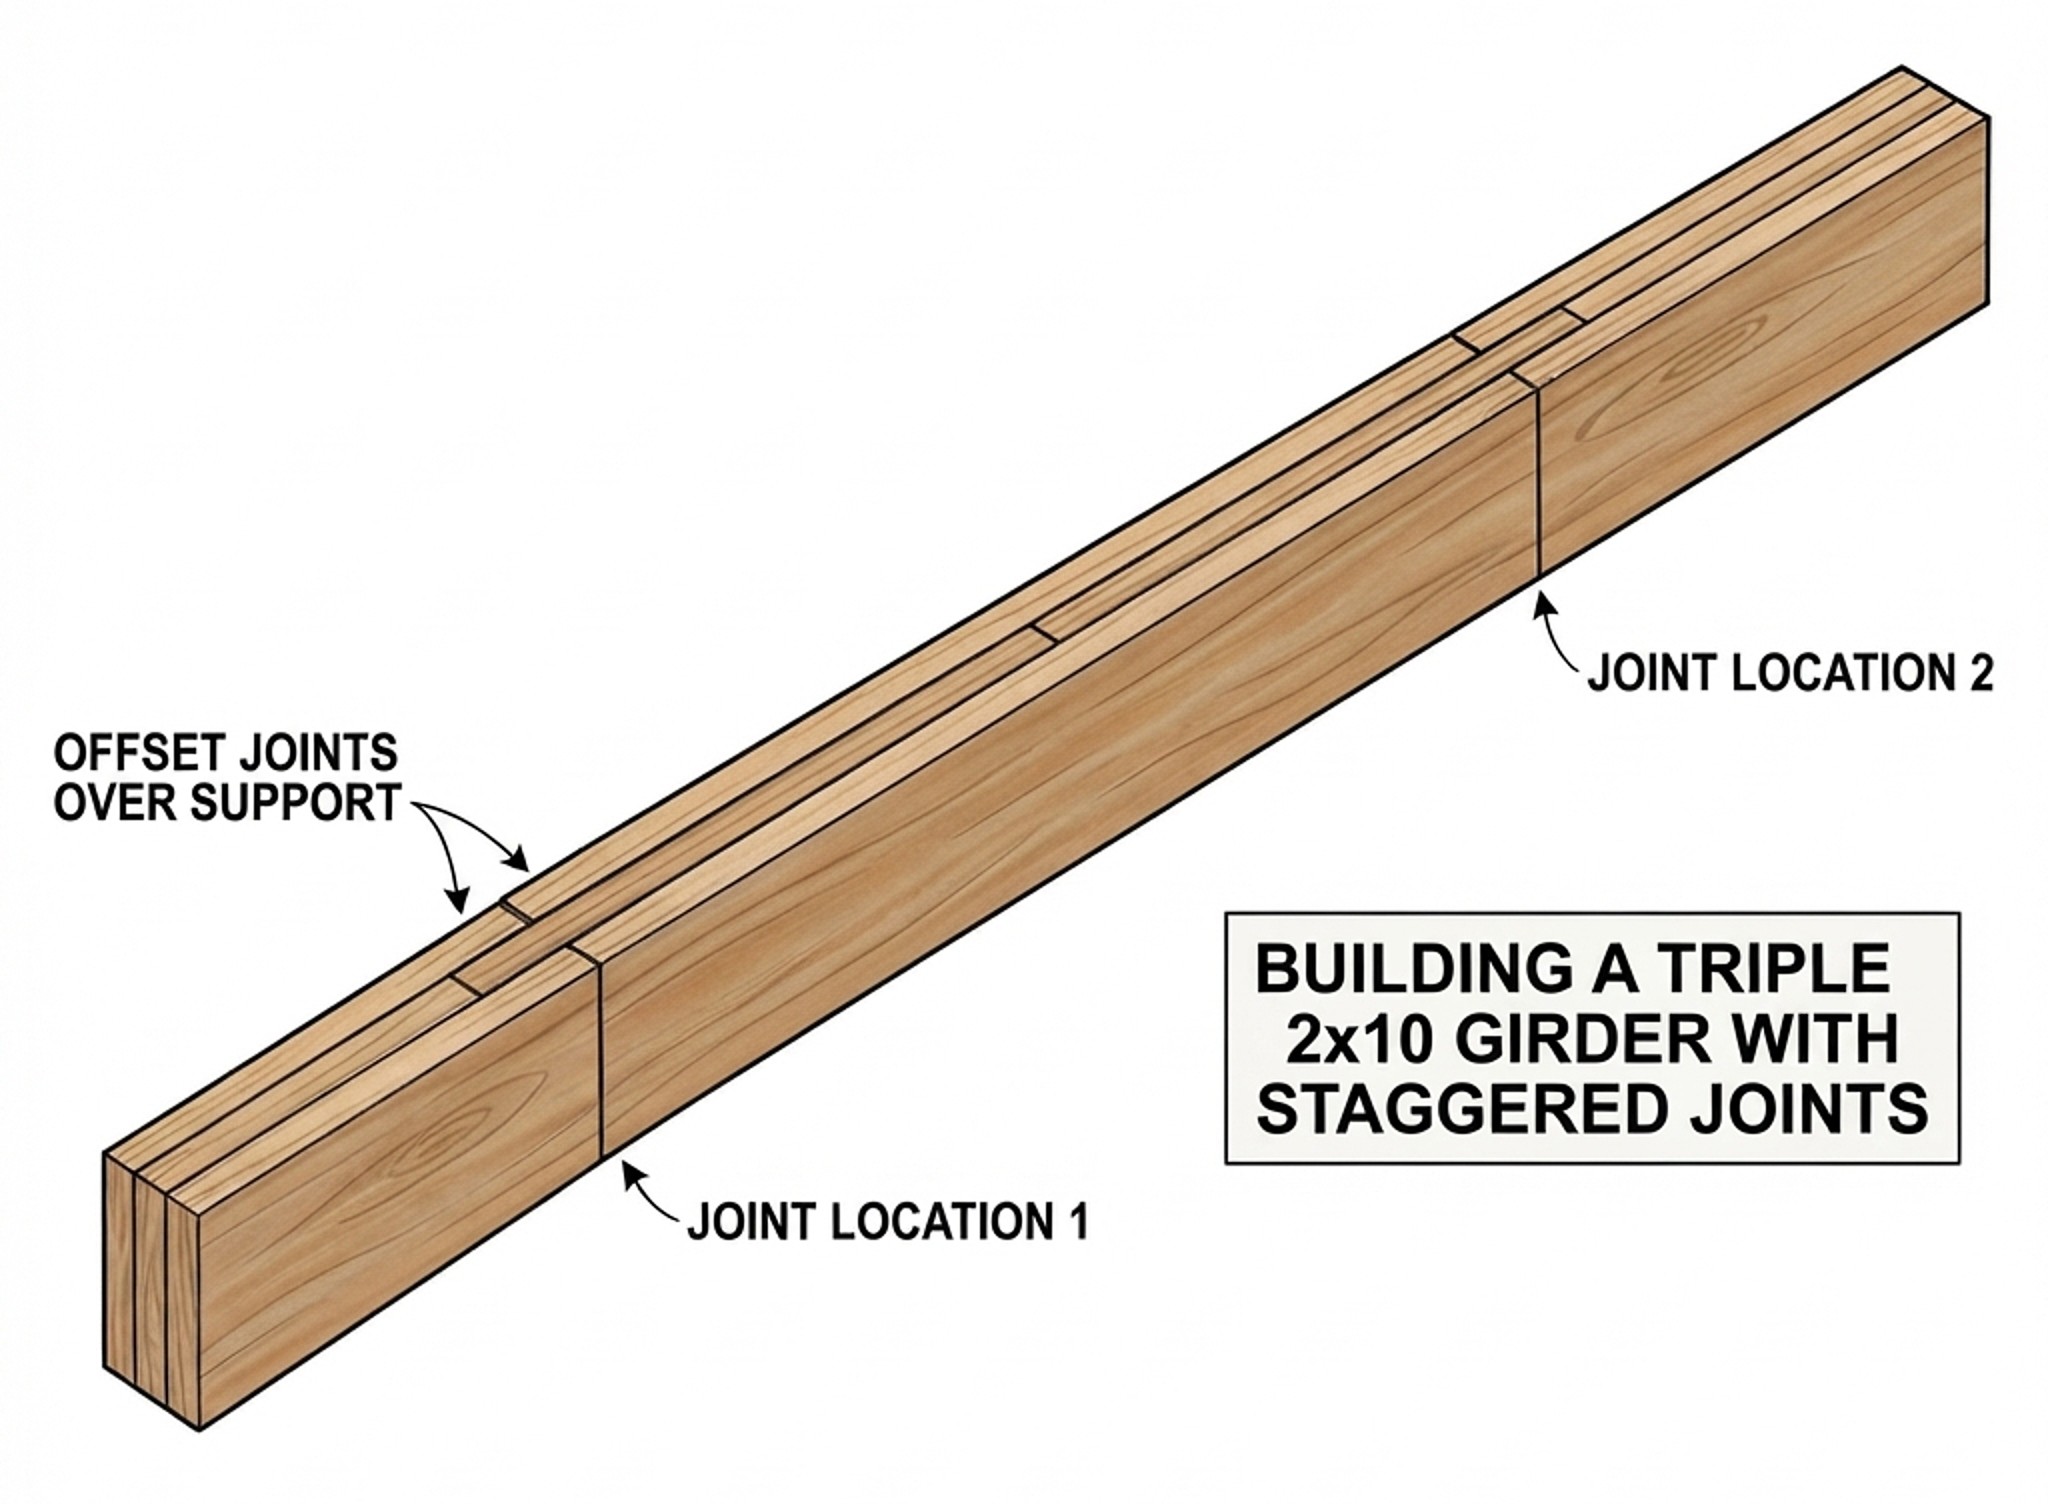
- Stagger the Butt Joints: Joints in adjacent plies must not occur in the same location. They should be off-set by at least 4 feet (or positioned directly over supporting posts/piers depending on building codes).
- Staggered Nailing Pattern: Fasteners should be driven in a distinct staggered layout (typically near the top and bottom edges, spaced roughly 12 to 16 inches apart along the length, with additional concentrated rows near the ends of each board) to properly bind the plies together into a single, cohesive beam.
Structural integrity in residential and commercial framing relies heavily on a top-down load distribution path:
- The Live and Dead Loads: People, furniture, and drywall (live/dead loads) press down on the finished floor and subfloor.
- The Floor Joists: The subfloor distributes this weight across dozens of parallel floor joists.
- The Girder: Rather than stretching completely from one exterior foundation wall to the other, the joists meet in the middle and transfer roughly half of their total weight directly onto the girder.
- The Piers and Foundation: The girder consolidates thousands of pounds of pressure and channels it down through heavy posts or piers into the concrete footings and foundation.
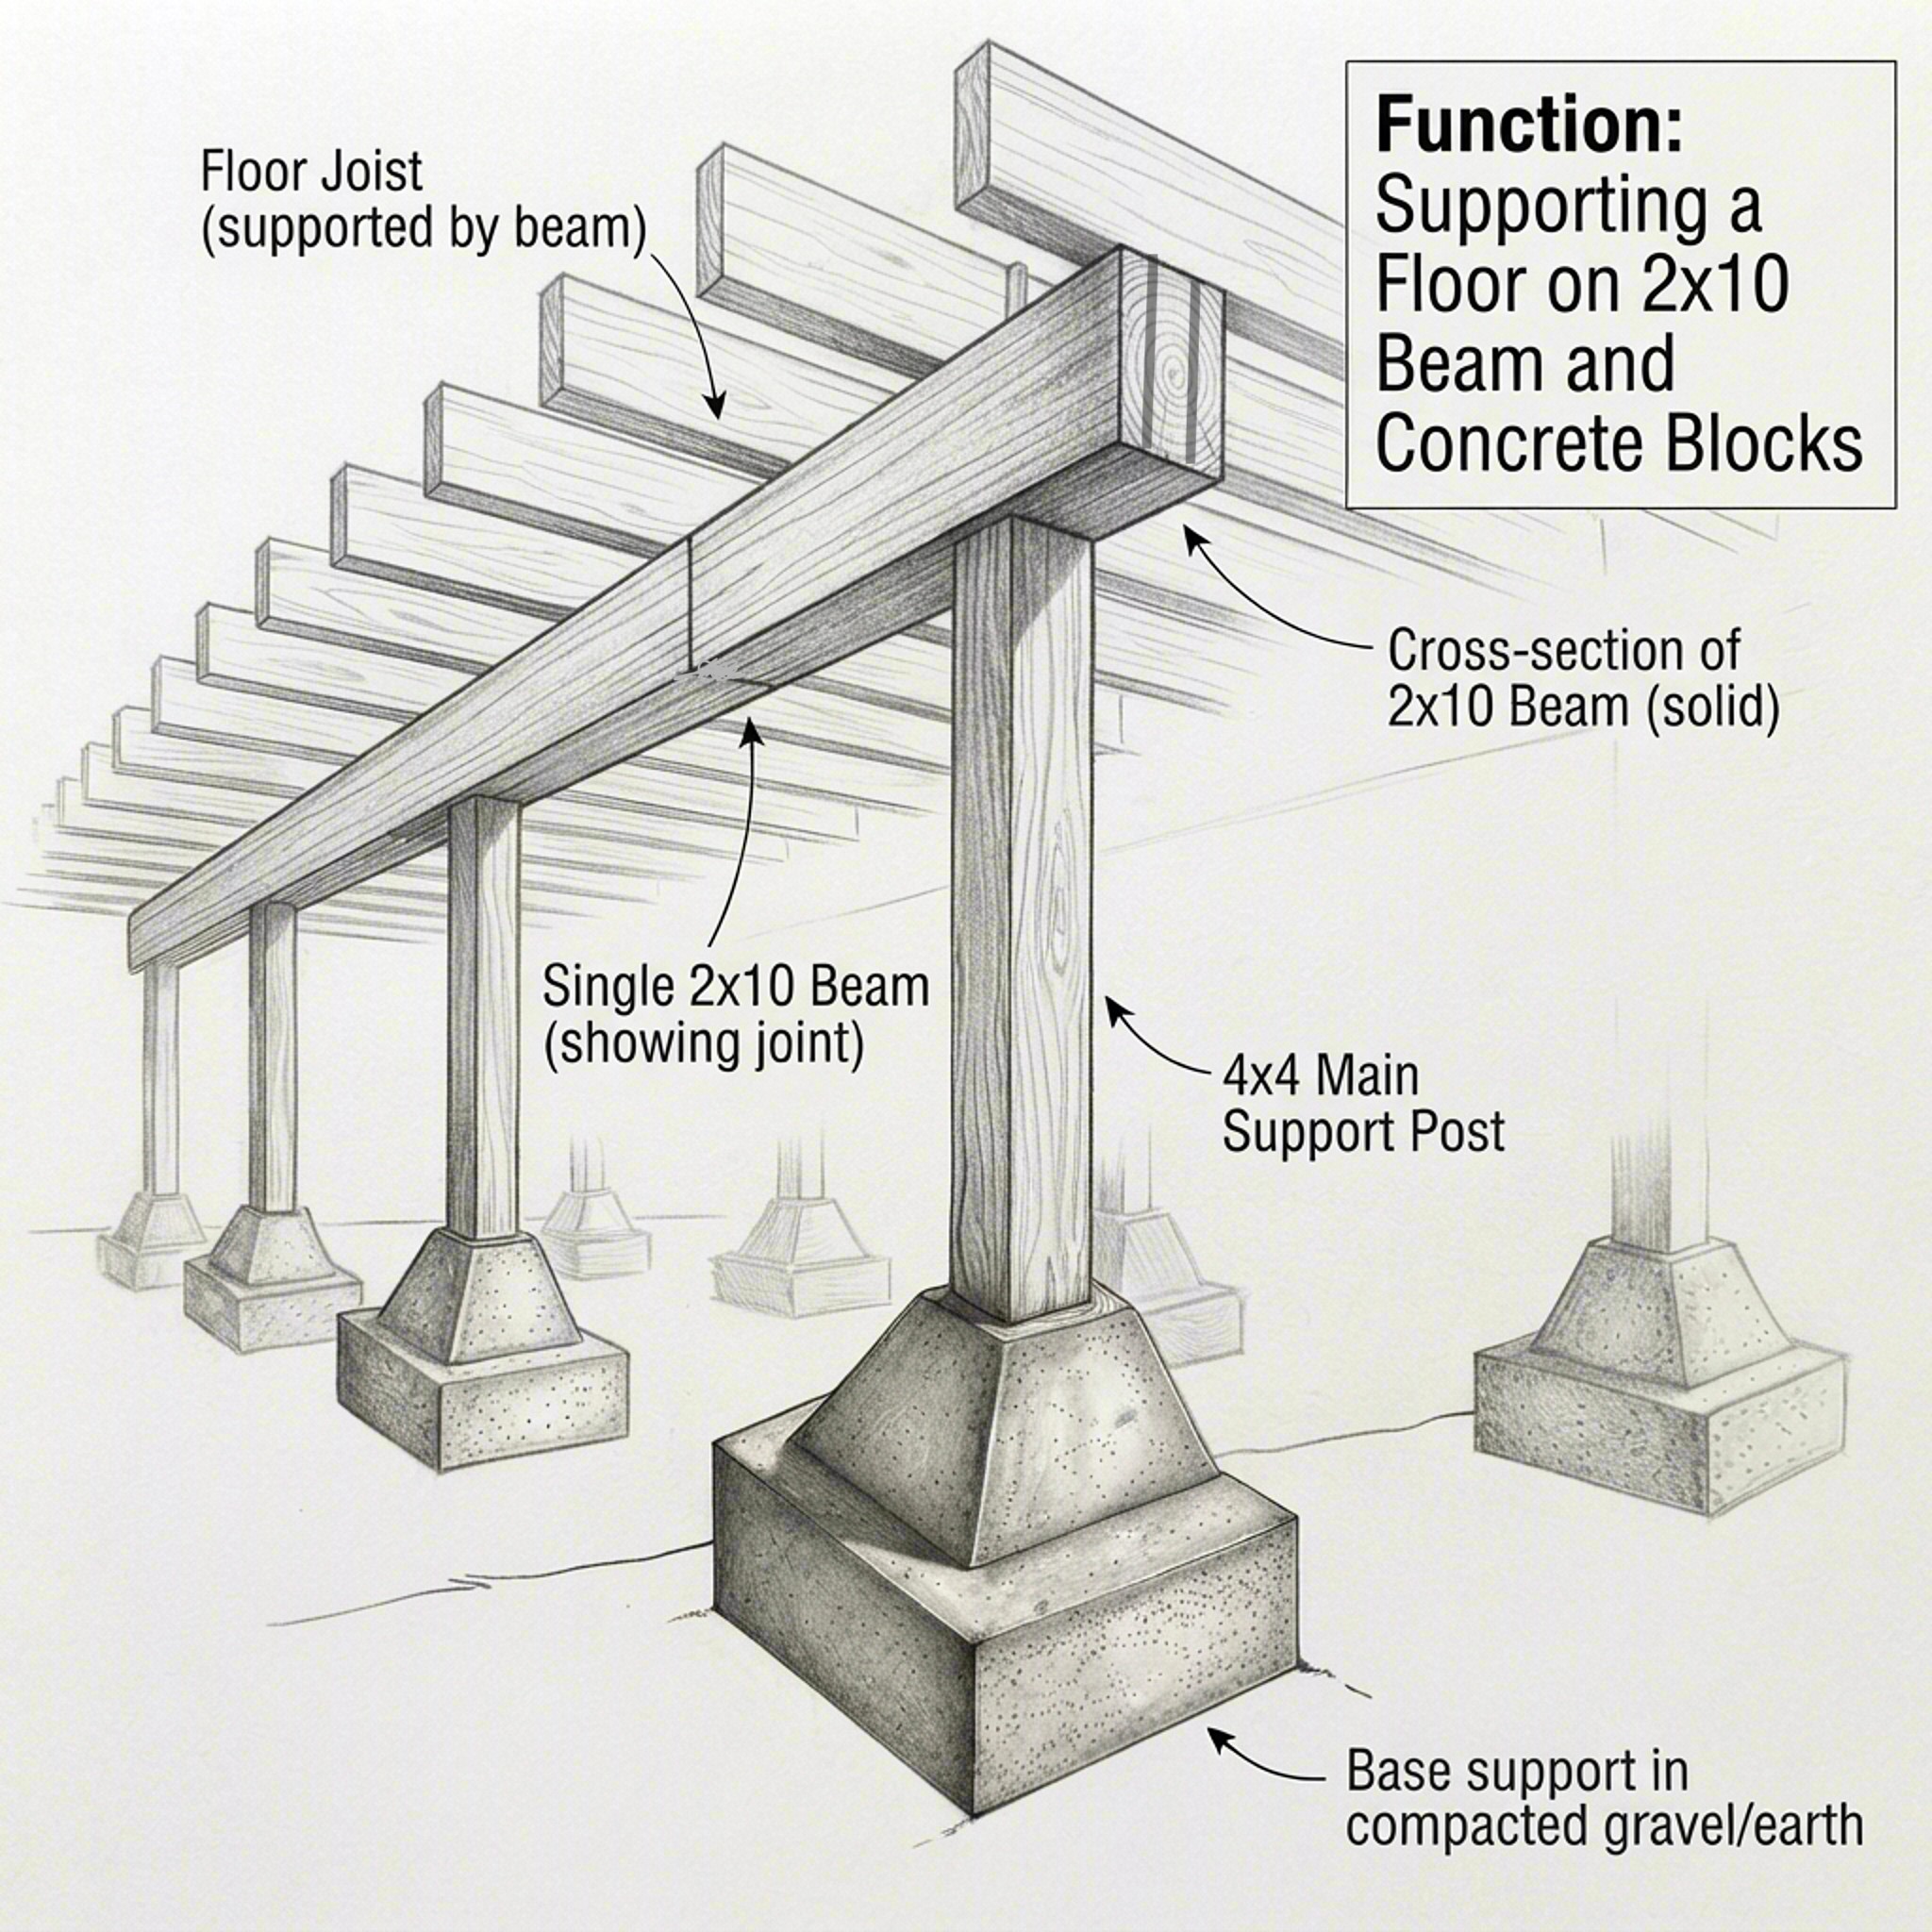
A strong girder is the most critical component of a floor framing system because it acts as the primary backbone that collects and transfers all the floor's weight down to the foundation. While floor joists directly support the subfloor and your living space, they have limited spanning capabilities. The girder (or main beam) runs perpendicular to the joists, breaking up their span and providing the rigid midline support they need to remain stable, level, and entirely rigid under load.
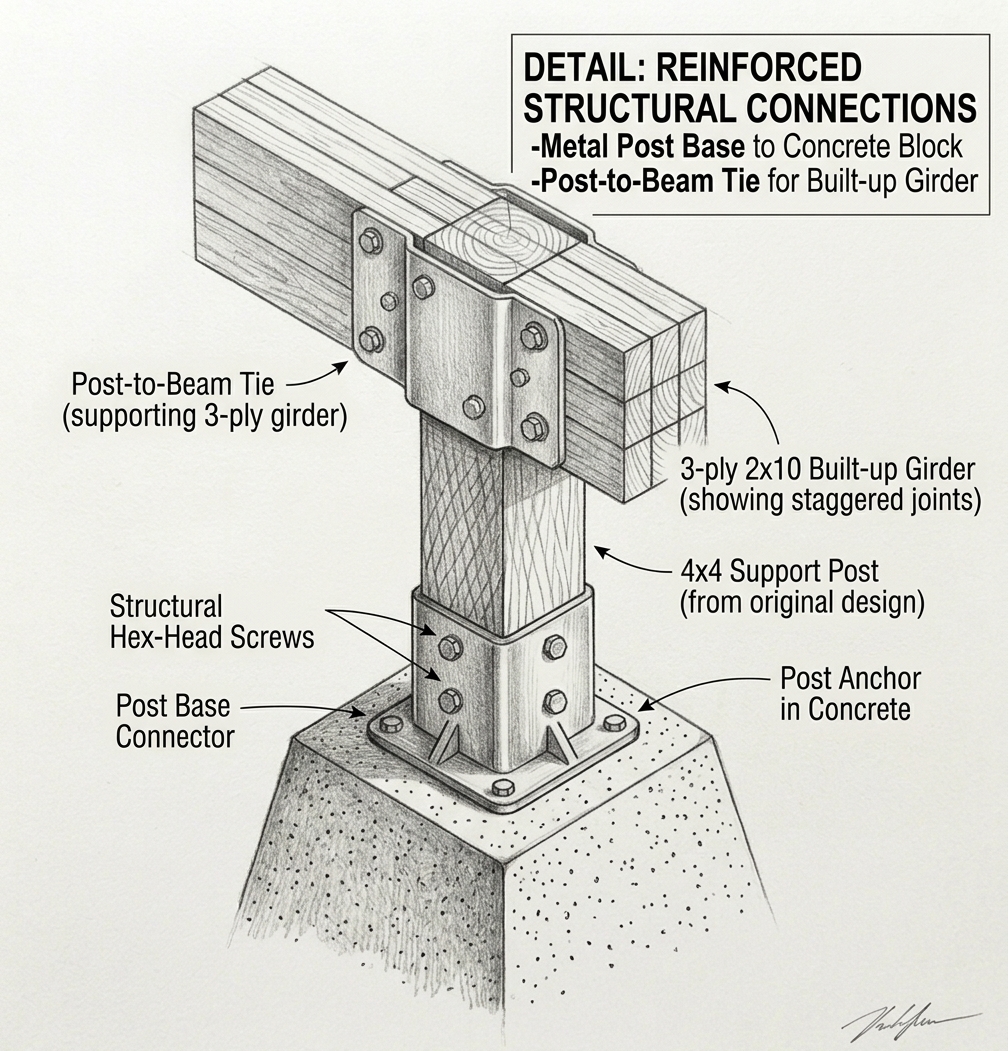
You want to secure your piers or girders with metal brackets and hangers so they don't work loose over the years. You will be walking on the floors everyday and that causes some vibration so it's best to secure all the posts and piers after you've installed them. Granted, there's a lot of weight, especially if there is an upstairs, so it doesn't seem like it will move much. Best to be sure.
Why a Strong Girder Equals Stable Joists
- Eliminates Vertical Sag: Wood naturally bends under continuous pressure (a phenomenon known as material "creep"). A robust, engineered timber or steel girder resists this bending force, keeping the midpoint of your joists perfectly level.
- Prevents Joist Twisting and Rotational Failure: When a girder remains perfectly rigid, the connection points between the joists and the girder stay completely square. If a girder sags or warps, it forces the ends of the joists to tilt or pull away from their fasteners, risking localized structural failures.
- Dampens Floor Vibration (The Bouncy Floor Effect): Even if joists are sized correctly, a flexible or undersized girder will act like a giant spring. When someone walks across the room, a weak girder flexes dynamically, transmitting a rolling bounce across the entire room. A stiff, multi-ply or steel-reinforced girder absorbs these dynamic shocks.