How to fasten a rim joist to a sill plate
Learning how to fasten a rim joist to a sill plate is easy and because you are attaching the face of a vertical board (the rim joist) to the flat face of a horizontal board beneath it (the sill plate), you should use a method called "toenailing". You are just creating a big box to put all the joists into.
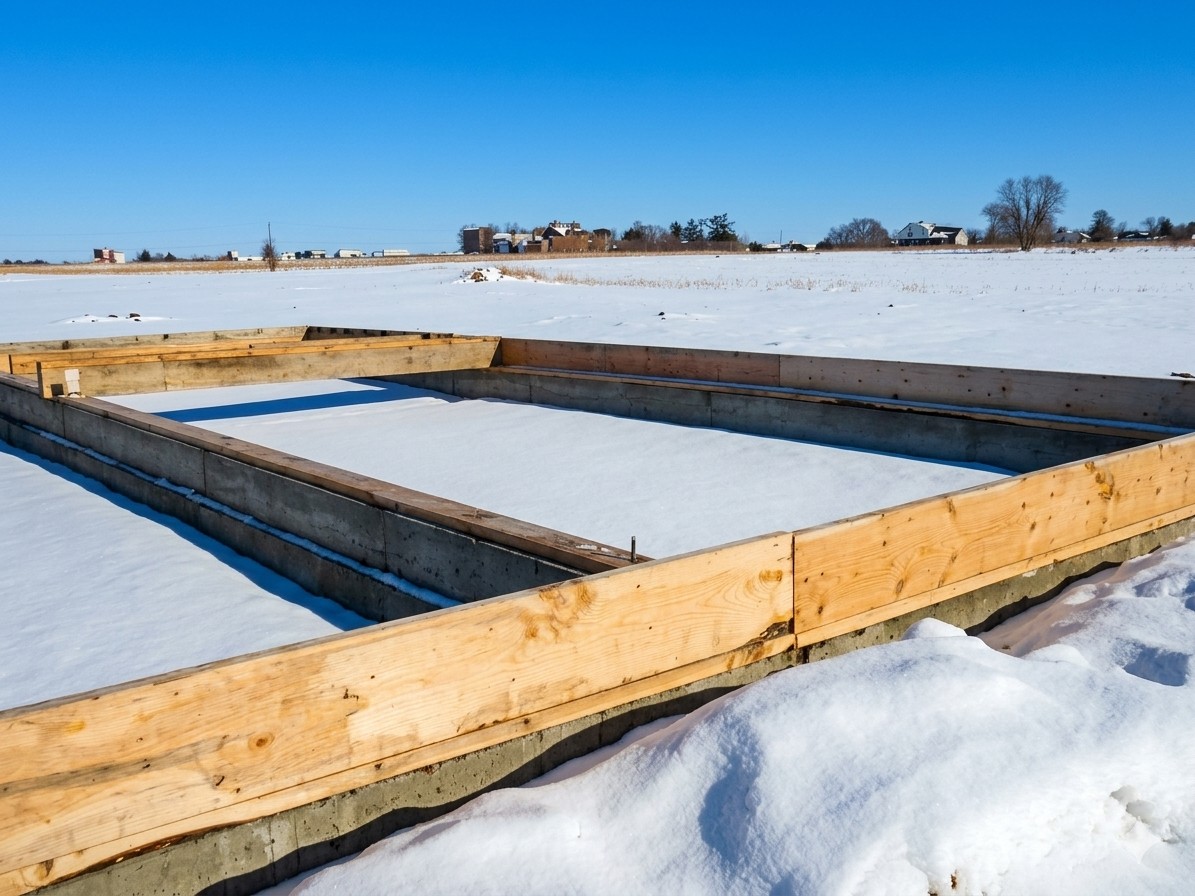
The rim joist sits directly on top of the sill plate, aligned perfectly with the outside edge of the foundation. It forms the outside perimeter frame of the floor system.
Installation Tip: Nail the rim joist down into the sill plate every 6 inches. This forms the solid outer box that prevents the floor joists from twisting.
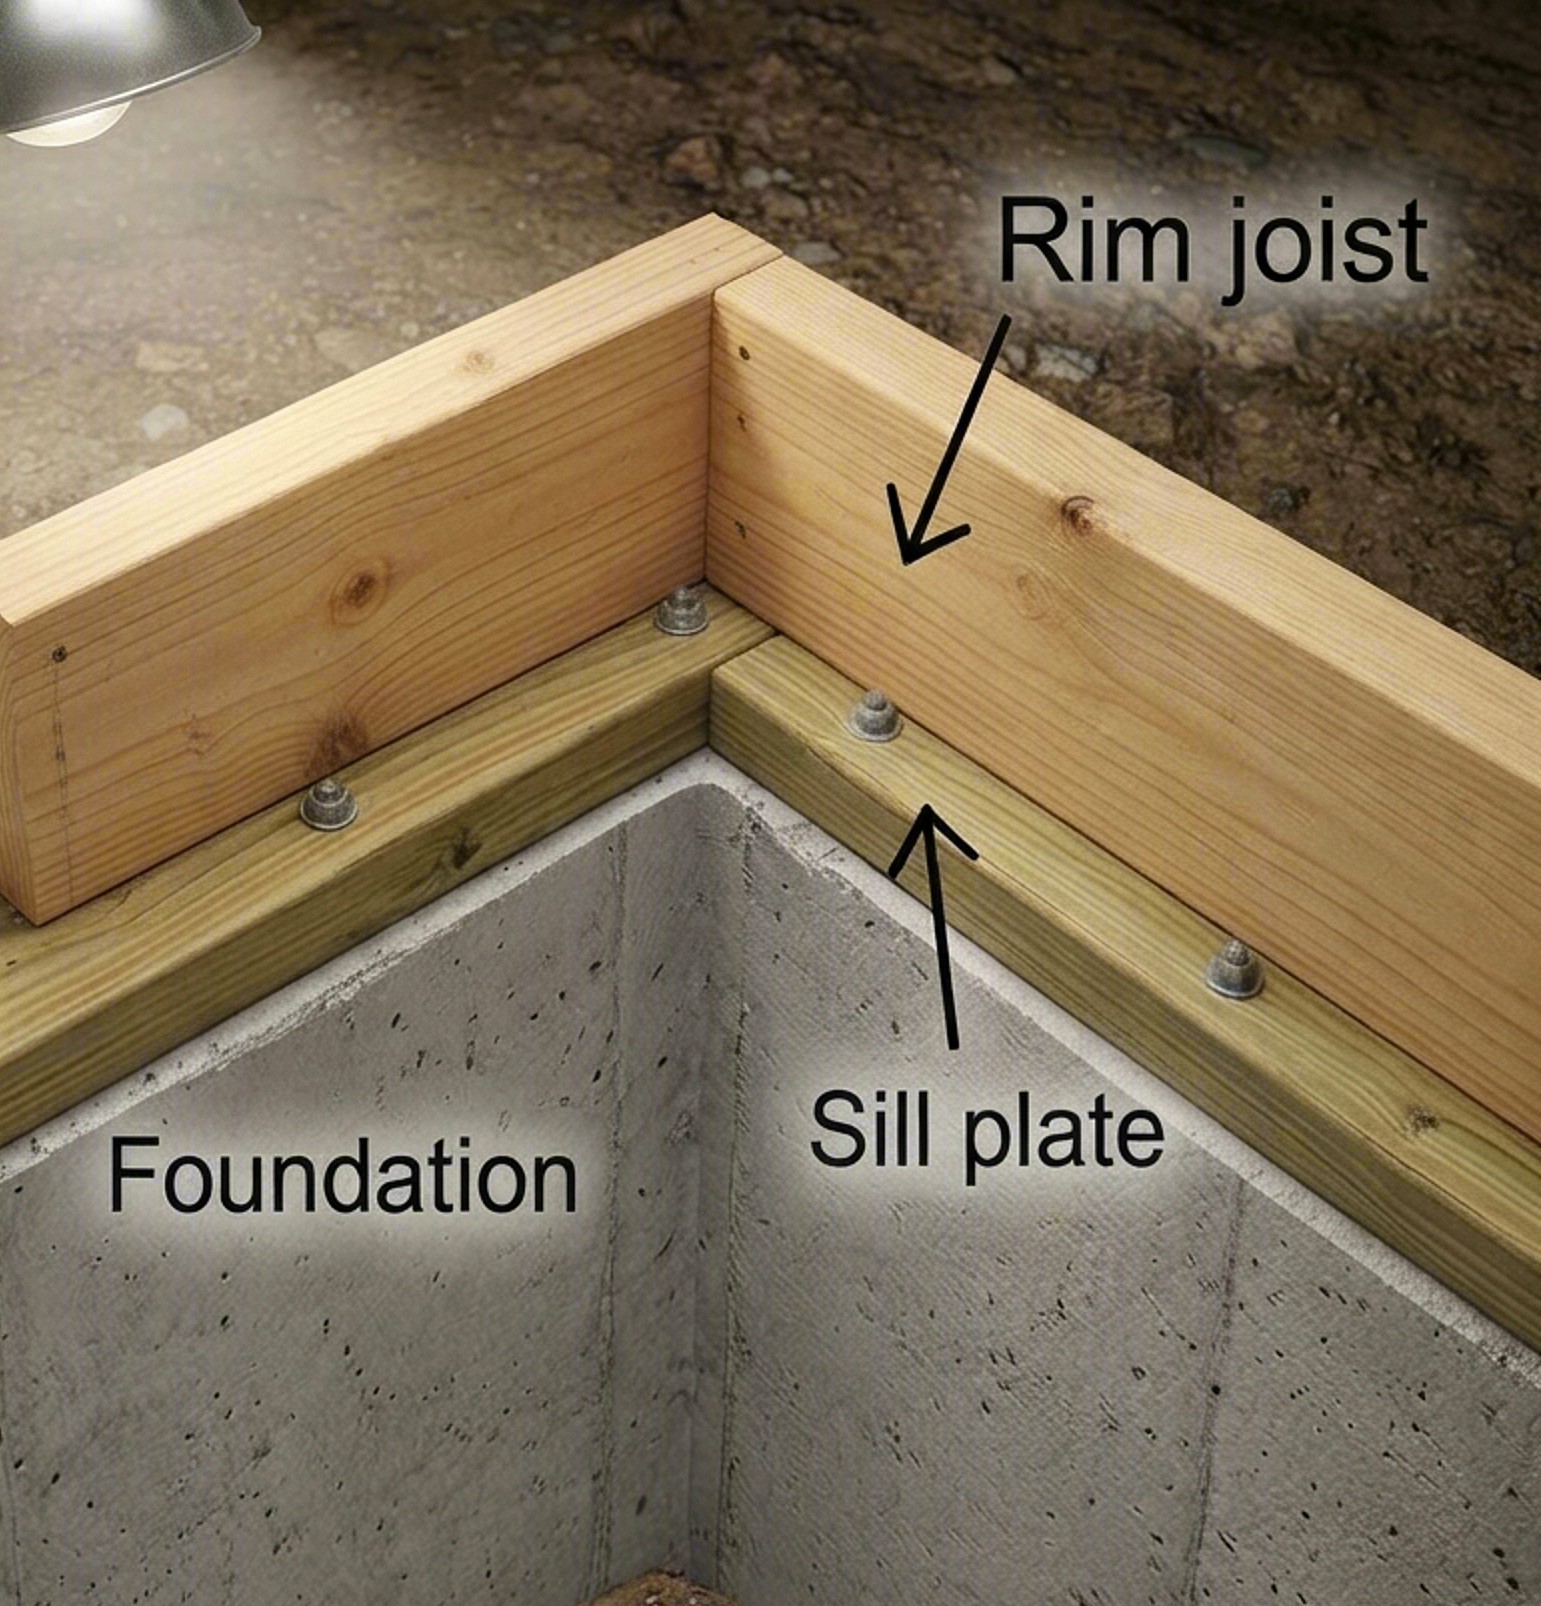
When you transition a house build from the concrete foundation to the wood framing, the first critical connection you make is attaching the perimeter rim joist to the underlying sill plate (mudsill). Getting this step right ensures your entire house is locked down against high winds, shifting soil, and lateral loads.
If you are a novice builder, nailing this structural "outer box" down properly does not have to be intimidating. This guide breaks down the code requirements, fastening techniques, and safety steps to get it right on the first try.
How to fasten a rim joist to a sill plate and mastering the "Toenail" technique
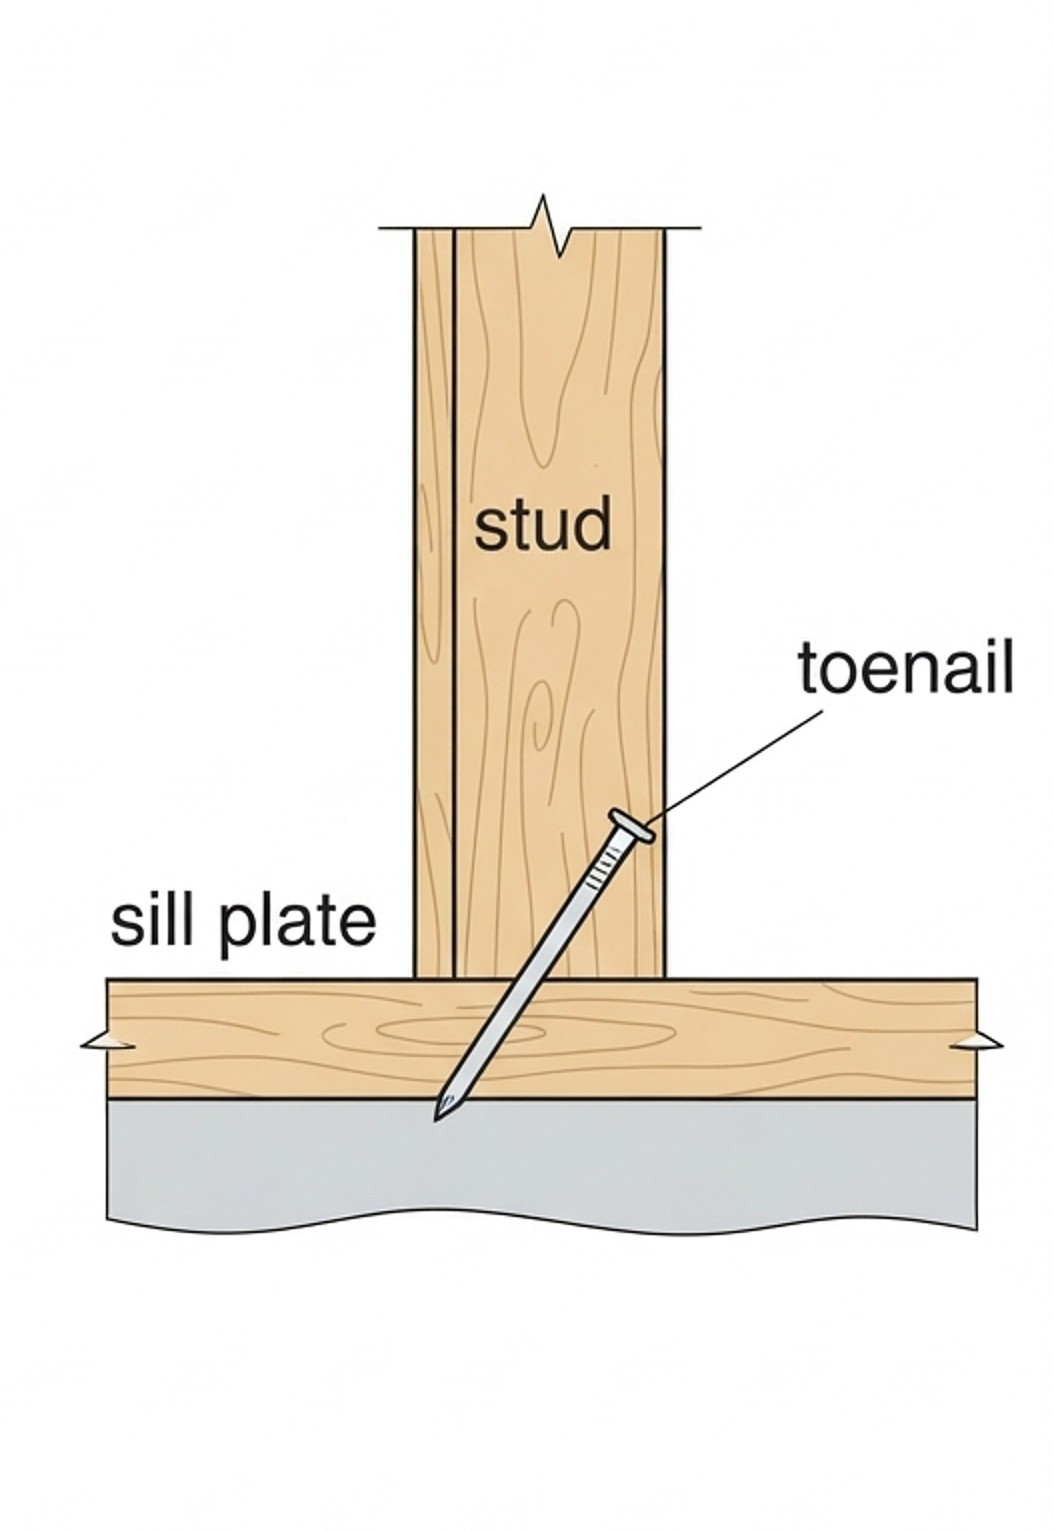
1. Align the Outer Edge: Set the rim joist completely flush with the outside edge of your sill plate.
2. Set the Angle: Hold your nail or nail gun at roughly a 45-degree angle, starting about 1 to 2 inches up from the bottom edge of the rim joist.
3. Drive the Fastener: Drive the nail downward through the inner or outer face of the rim joist so it penetrates deeply into the meat of the sill plate below.
4. Alternate Sides: For maximum structural stability against high winds, alternate driving your toenails between the inside face and the outside face of the rim joist along your 6-inch layout line. Toenailing is part of learning how to fasten a rim joist to a sill plate.
1. Choosing Your Fasteners: Code-Compliant Nails and Screws
Before reaching for your tool belt, you must choose a fastener that meets standard building codes and won't corrode over time.
Standard Nailing: The International Building Code (IBC) specifies using 8d common nails if you choose to use nails instead of screws.
Corrosion Protection: Because your sill plate is made of chemically pressure-treated lumber to prevent rot, the copper chemicals inside it will eat away standard raw steel nails. You must use hot-dipped galvanized nails or approved stainless steel.
Structural Wood Screws: Alternatively, code-approved structural framing screws can be used. They offer massive holding power and pull warped rim boards tightly down against the plate.
2. The Correct Spacing and Nailing Schedule
To prevent your rim joist from twisting or buckling under the vertical load of the house, building codes mandate a strict fastening schedule.
6 Inches On Center: Drive your fasteners every 6 inches along the entire continuous length of the rim joist.
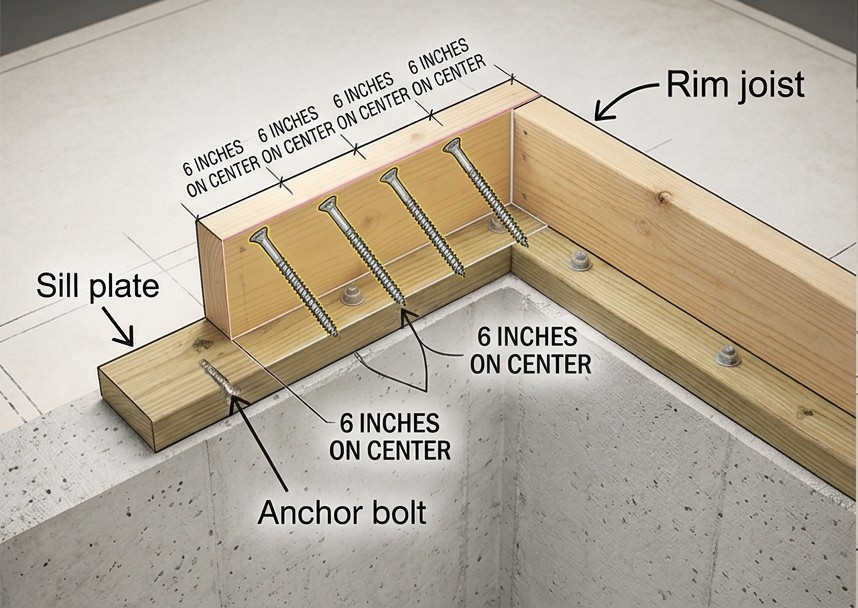
Avoid the Ends: Keep your nails at least 2 inches away from the absolute ends of the rim joist boards. Placing fasteners too close to a raw cut end splits the wood grain, rendering the connection useless. The basic idea is to make the rim joist as secure and stable as possible even before connecting the floor joists, which will make it all much stronger.
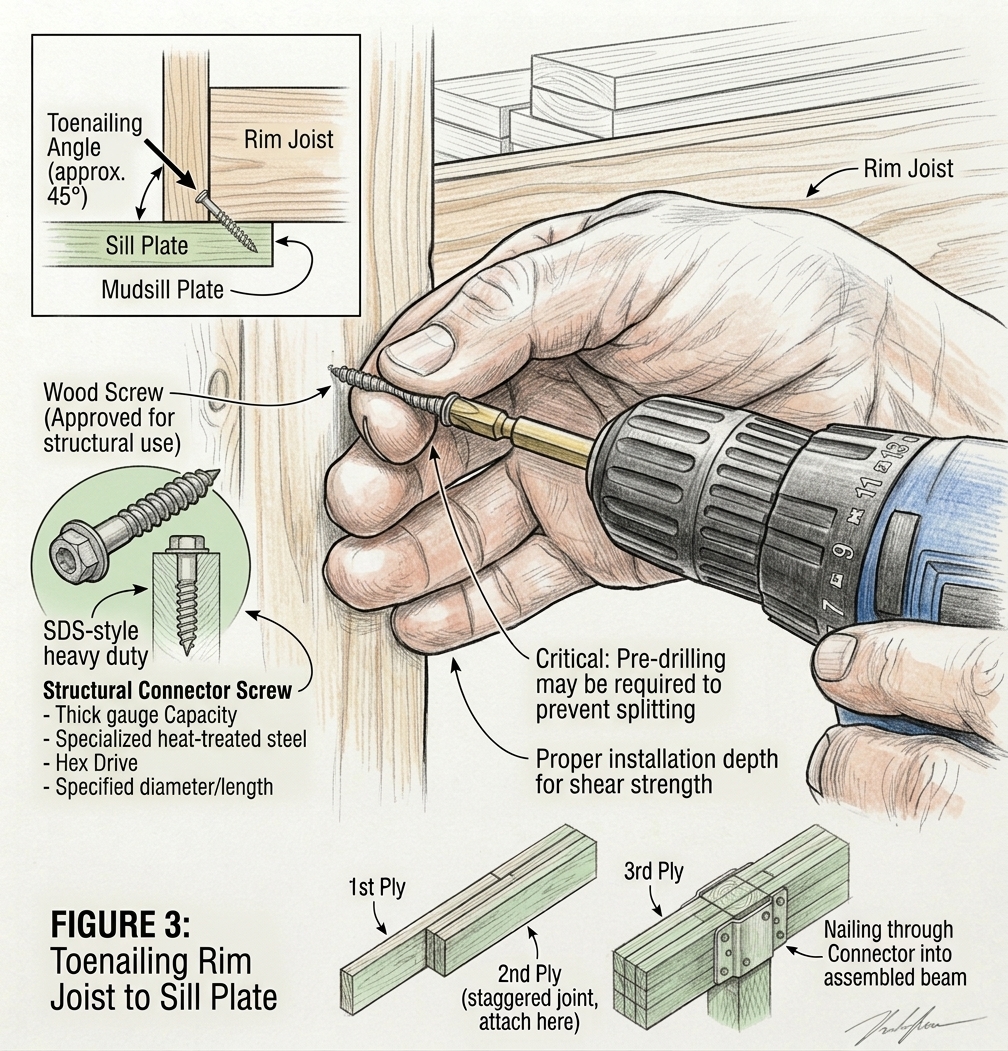
You might prefer to use screws for securing the rim joist instead of nails simply because you will need the boards to stay in place while securing them and hammering causes a lot of vibration. It's a matter of choice. If you can get an air stapler, even better. For now, a good old fashioned screw gun works perfectly for this.
Layout and Fastening: Installing the Floor Joists
Floor joists are the horizontal framing members that support the floor. For a typical home, you will use either dimensional lumber (like 2x10s) or engineered I-joists.
- Spacing: Mark your sill plate and rim joist every 16 or 24 inches "on center" (from the middle of one joist to the middle of the next) to match standard plywood subfloor sheets.
- Fastening: Floor joists are easy to fasten because you can "end-nail" them by driving nails straight through the outside face of the rim joist into the end of each floor joist.
- Crown Up: If using 2x10 lumber, look down the edge of the board to find the natural curve (the crown). Always install the board with the crown facing up. Over time, gravity and the weight of the house will flatten it out.
How to find the crown in 2X10 boards
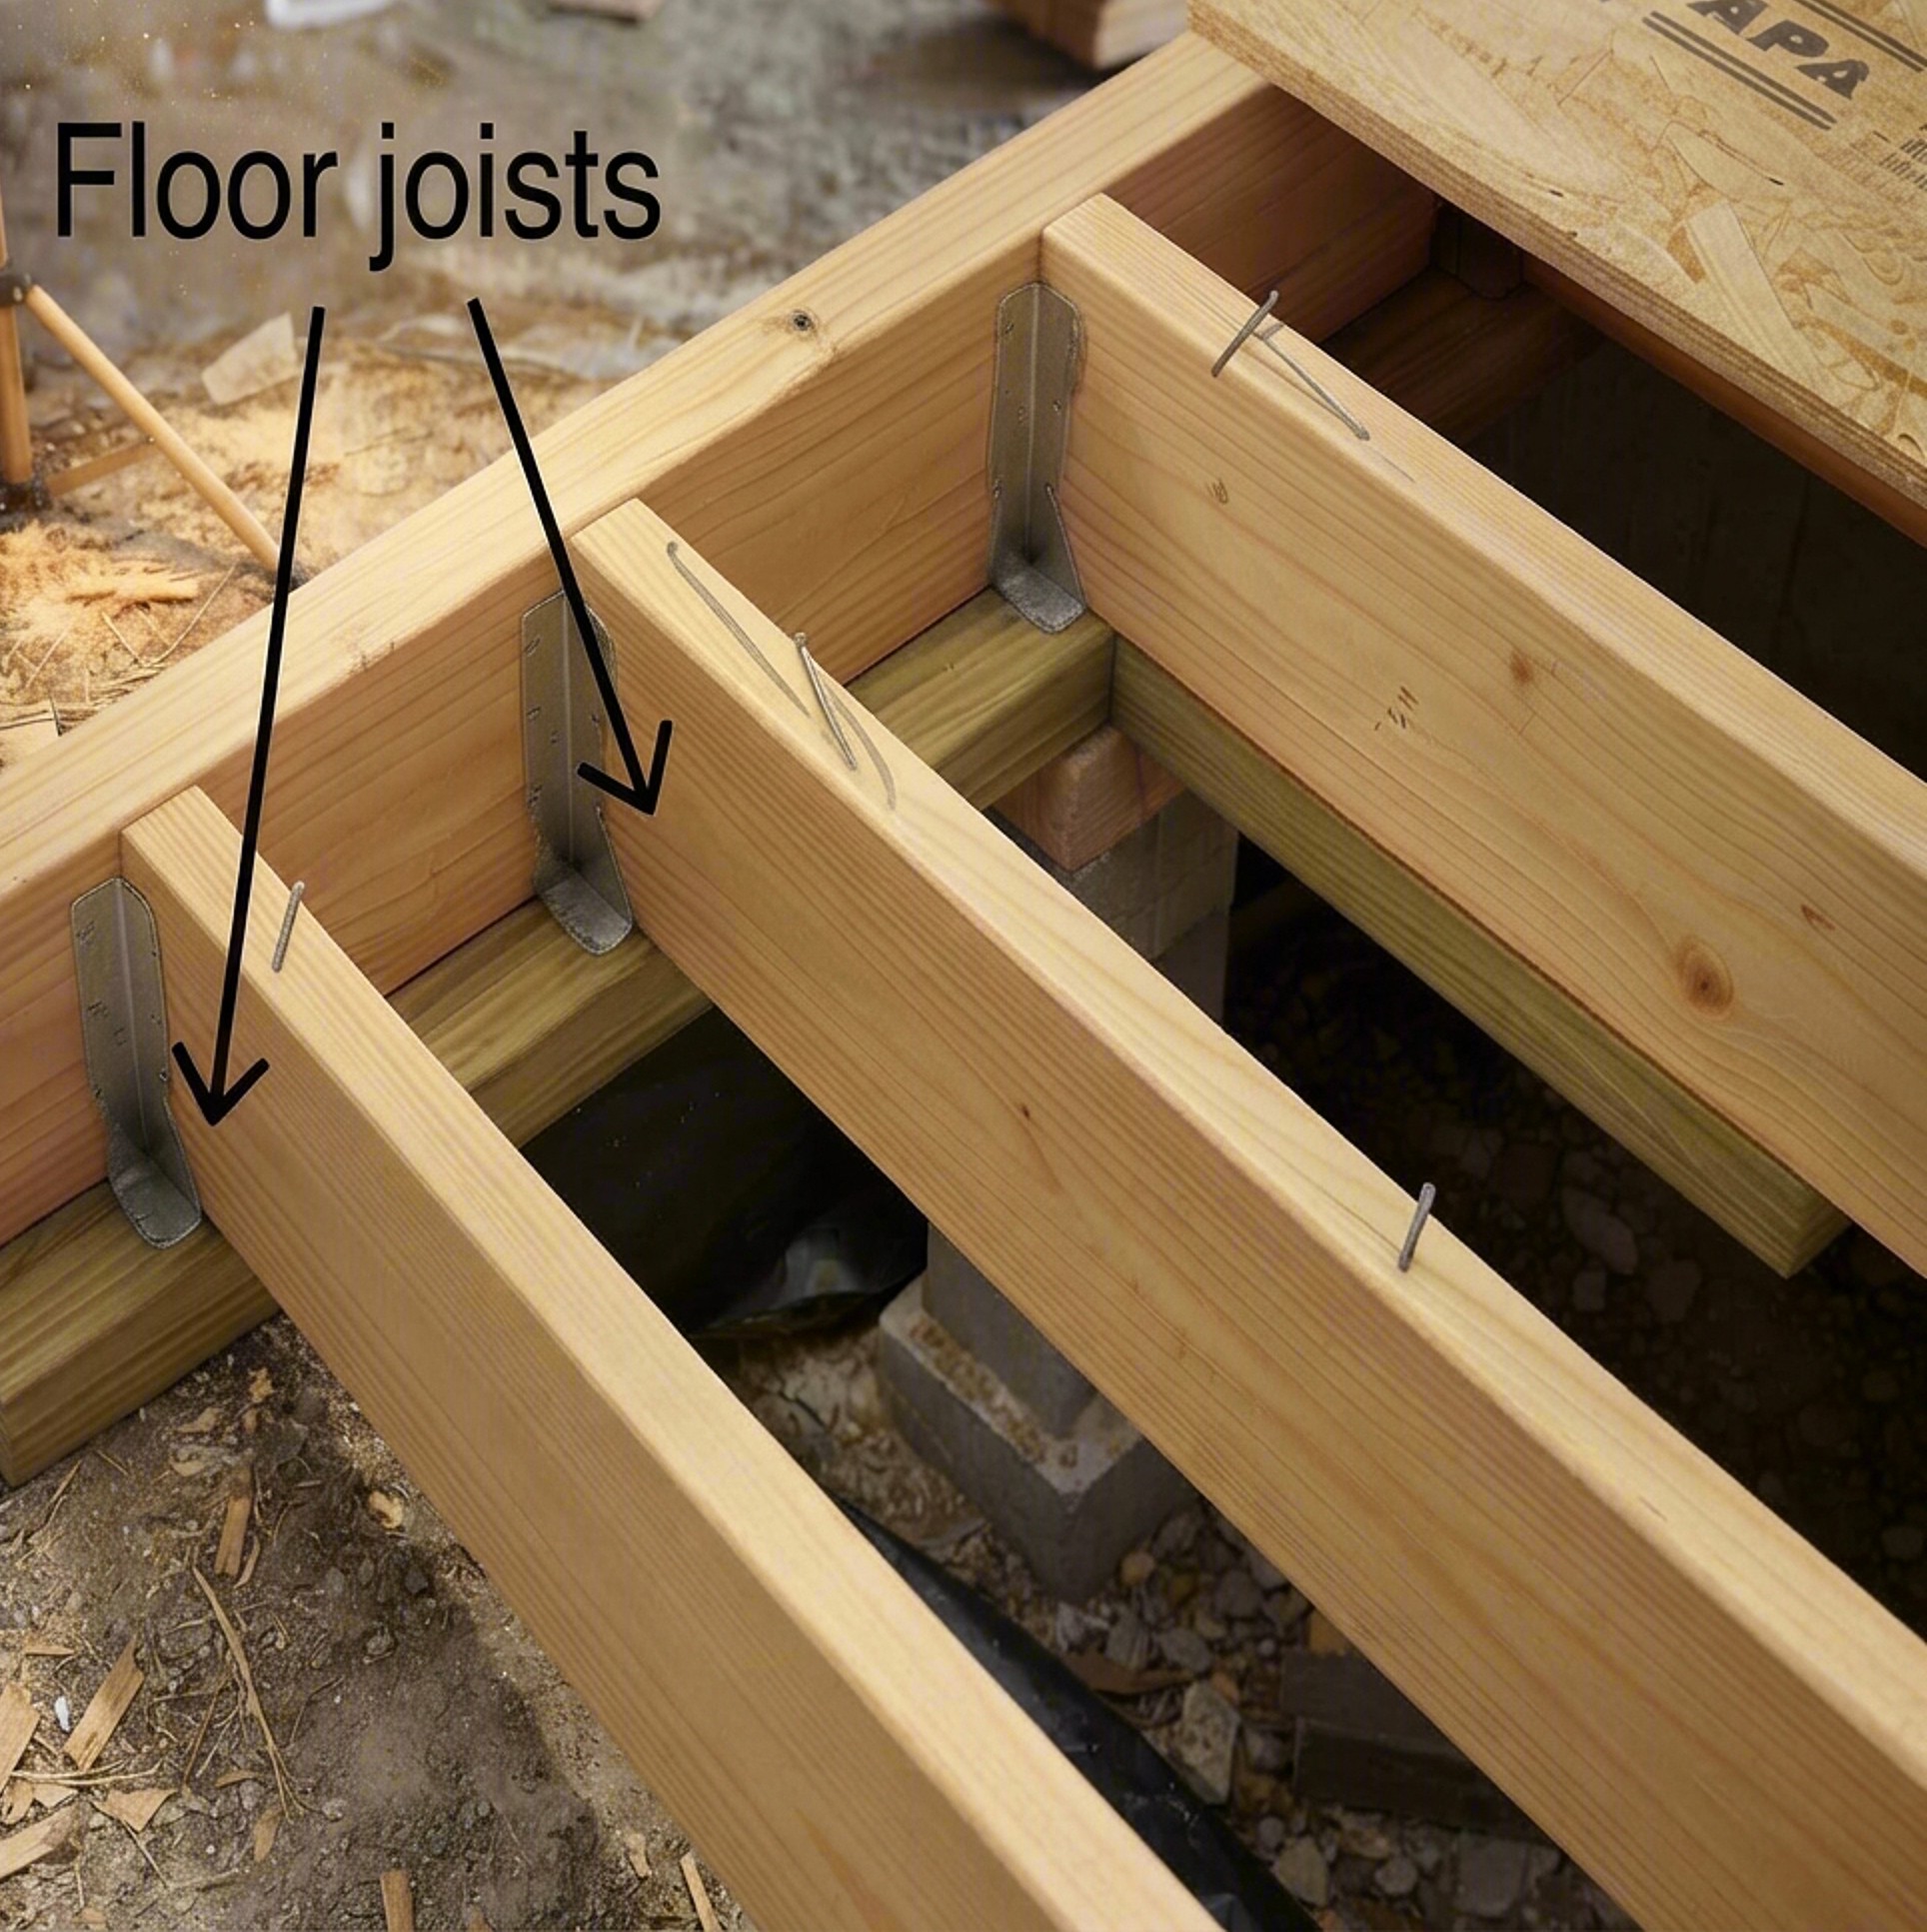
The floor joists will rest on the sill plate and can be nailed or screwed from the outside. That is the easiest and most secure way install the joists. Joist hangers are easy to put on and they help keep the joist from buckling.
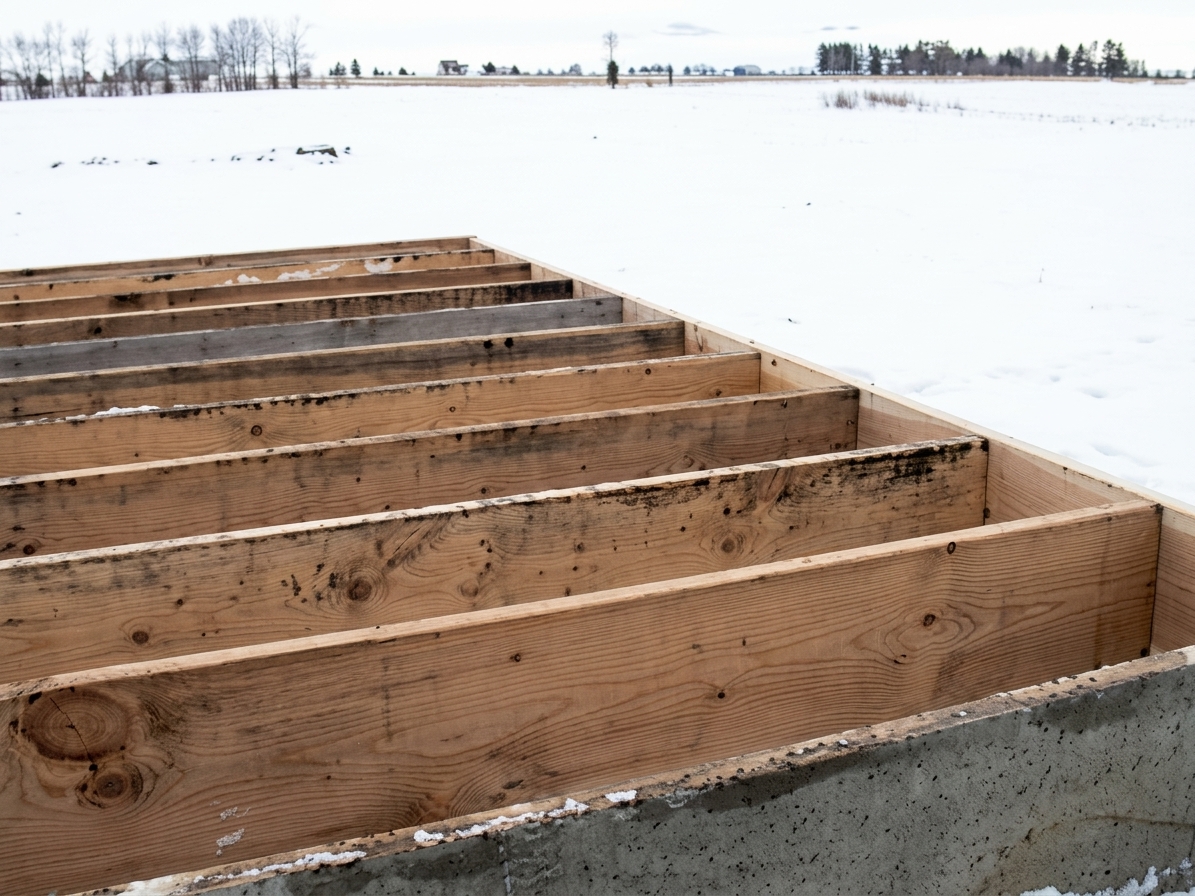
These joists look really dirty because I used them for the foundation forms. If you are able to get dual uses or your 2X10s, make sure you clean them up and try to chip off any residual cement so it doesn't cause problems.
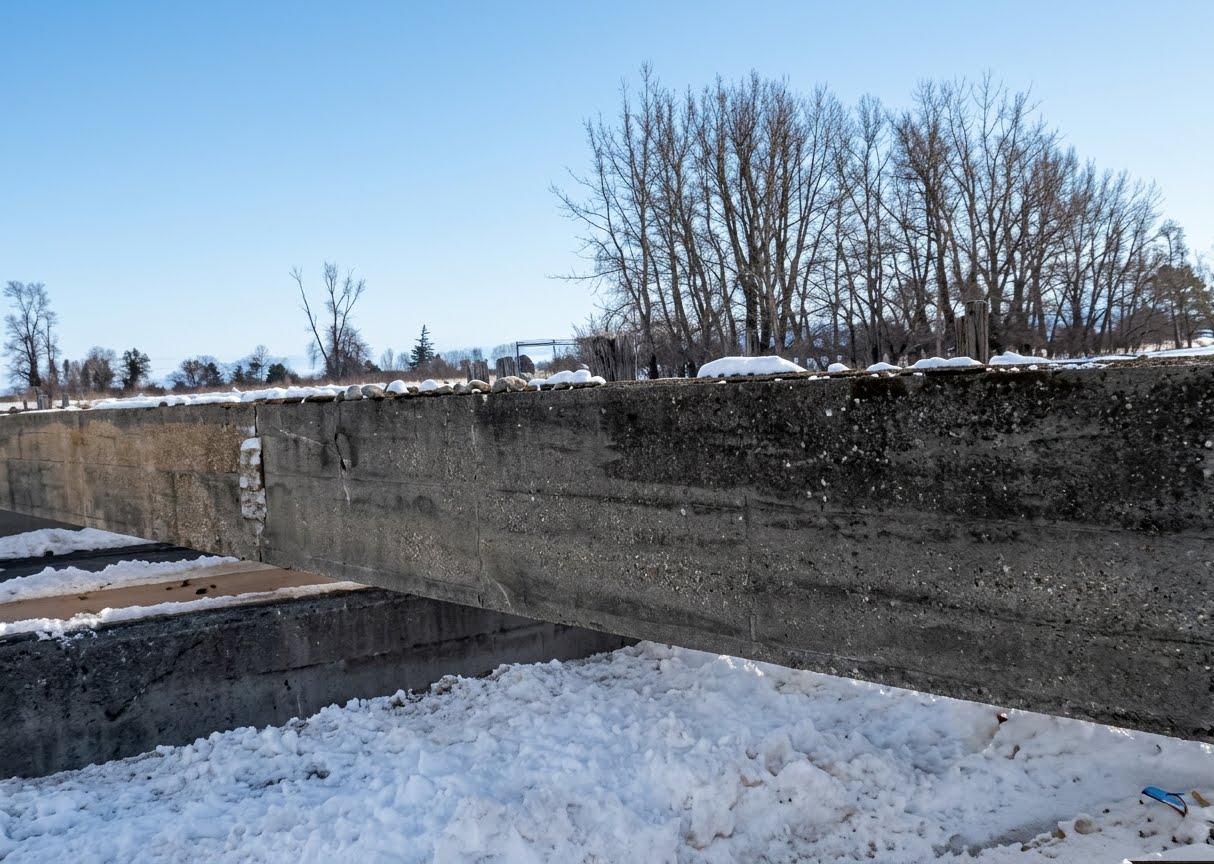
I chose to run a concrete foundation up the middle of my foundation because I thought it was cheaper than installing cement blocks and using wooden girders. I'm certain that I was wrong about the cost. I should have run blocks and girders.
Mid-Span Support: Girders and Posts
Because most house foundations are wider than a single board is long, floor joists cannot span the entire distance without sagging. You must install a girder (a large central support beam) running down the middle of the foundation to support the inner ends of the joists.
- Building a Girder: You can build a girder by nailing multiple 2x10 boards together face-to-face. To maintain strength, ensure the staggered joints (where individual boards meet) do not line up with one another.
- Supporting the Girder: The girder rests on wood posts (like a 4x4) or adjustable steel columns. These posts must sit on a concrete pier or a deck block.
- Foundation Planning: Because the weight of the entire house transfers down through these posts, the piers must rest on a solid concrete footing poured below the frost line. This requires planning ahead during the initial foundation excavation.
- Overlapping Joists: Where the floor joists meet over the top of the central girder, let them overlap (offset) by a few inches so you can easily nail them to each other and down into the beam.